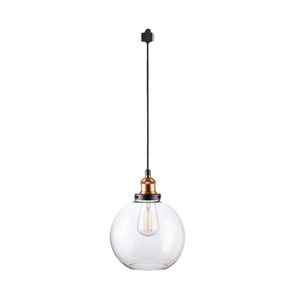
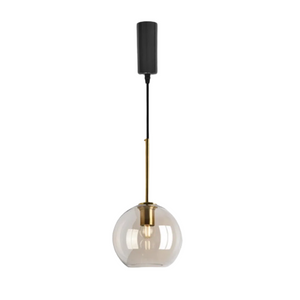
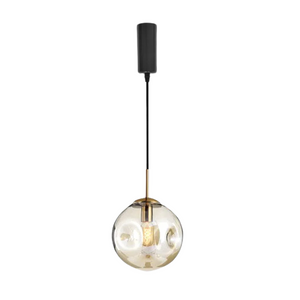
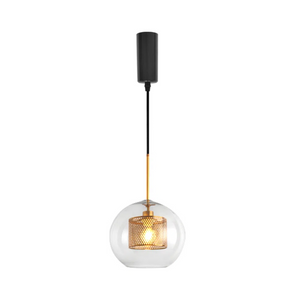
Old house charm comes with old house problems, especially when upgrading lighting fixtures. Most homeowners hit the same three roadblocks: weird wiring they can't identify, junction boxes that don't exist, and flickering that won't quit. Figuring out how to install a ceiling light safely means tackling these issues head-on, though battery operated ceiling lights can sidestep the electrical work entirely if you need a quick fix.

Problem 1 – Outdated or Incompatible Wiring
Opening up your ceiling to install new lighting fixtures can be a surprise. Homes built before the 1980s have wiring that looks completely different from what you'd see today. Different decades used different materials, and not all of them work well with modern fixtures.
How to Identify Your Wiring Type (Knob-and-Tube, Aluminum, etc.)
Before you figure out how to install a ceiling light, you need to know what wiring you have. Here's what to look for:
- Knob-and-Tube Wiring (1880s-1940s): Individual wires held up by ceramic knobs and running through ceramic tubes in the framing. The wires have cloth insulation and run separately, never bundled together. There's no ground wire.
- Aluminum Wiring (1960s-1970s): The wire looks silver or gray instead of copper-colored. Check the cable for "AL" or "ALUMINUM" stamped on it. This wiring became popular when copper got expensive but causes problems with some fixtures.
- Early Romex Cable (1950s-1960s): Wires bundled in fabric or early plastic covering. Usually no ground wire—that's the bare copper or green wire you see in newer systems.
- Modern Wiring (1970s-present): Wires in plastic sheathing (white, yellow, or orange) with clear labels. Always includes a ground wire. To check your wiring, turn off the circuit breaker, then remove the old fixture or look in the attic above where you want lights. Take photos if you're not sure what you're seeing.
Can You Install Modern Lighting Fixtures on Old Wiring?

Sometimes yes, but usually with modifications.
- Knob-and-tube wiring can technically power lighting fixtures, but it's risky. The insulation breaks down over time, and there's no grounding. Many insurance companies won't cover homes with active knob-and-tube. You need an electrician to check if it's safe to use.
- Aluminum wiring works with modern lights if you use the right connections. You need fixtures marked "CU/AL" or special connectors installed by an electrician. Never connect aluminum wire directly to copper-only fixtures—it creates fire risks from overheating.
- Old wiring without a ground is normal in pre-1960s houses. LED fixtures usually work fine without grounding, but metal fixtures need proper grounding for safety. Plastic or glass fixtures are safer on ungrounded circuits. Check if your old wiring can handle the electrical load too. Even though LEDs use less power, old systems might struggle with multiple fixtures or heavy chandeliers.
Solution: Upgrade vs. Workaround Options
You have three choices based on your budget:
- Full Upgrade (Safest, Most Expensive): Rewire the ceiling circuits with modern, grounded wire that meets current codes. Costs $1,500-$4,000 per room depending on ceiling access. This is the best long-term fix and solves insurance problems with knob-and-tube wiring.
- Partial Upgrade with GFCI Protection: An electrician installs a GFCI breaker on the circuit, which adds protection to ungrounded systems. Allowed by code in most areas. You still need appropriate fixtures and possibly grounding connections to metal boxes. Costs $300-$800.
- Use Compatible Fixtures: Pick lighting fixtures that match your wiring. Plastic fixtures for ungrounded circuits. CU/AL-rated fixtures for aluminum wiring. Keep fixtures lightweight to avoid stressing old boxes. Cheapest option but doesn't fix the underlying electrical problems.
- Try Battery-Powered Options: If your wiring is too old or you're renting, battery operated ceiling lights skip the electrical work completely. These mount without any wiring and use LED bulbs for long battery life. More details on these later. Never ignore warning signs like burning smells, warm switches, or breakers that keep tripping. These mean you have serious problems that need an electrician right away.
Problem 2 – Missing or Damaged Junction Boxes
You remove your old fixture and find bare wires hanging from a hole with no box. Or there's a box, but it's cracked, loose, or too small. This happens all the time in old houses, and you can't skip fixing it.
Why Junction Boxes Matter for Safety
Junction boxes are required by code when you install a ceiling light for these reasons:
- Contains fire: The box contains sparks and heat from failed connections. Without it, electrical arcs can ignite wood and insulation in your ceiling.
- Prevents loose wires: The box protects connections from getting pulled apart by weight, tugs, or vibrations. Loose wires cause arcing and fires.
- Supports weight: Lighting fixtures need proper mounting. The box anchors to ceiling joists or bracing so fixtures don't pull loose.
- Fixes hazards: Old houses often have fixtures mounted with just twisted wires and tape, or boxes too shallow for current code. Both are fire hazards.
How to Install a Ceiling Light Without an Existing Box
If there's no box, you need to install one. The method depends on ceiling access and fixture weight.
- For Light Fixtures (Under 10 lbs) with Attic Access: Go into the attic and find where the wires come through. Install a standard ceiling box nailed or screwed to a joist. If wires are between joists, use an adjustable bar hanger that spans between joists. Position the box, secure the bar, then connect wires. Takes about 30 minutes for most lighting fixtures.
- For Heavy Fixtures (10-50 lbs) with Attic Access: Use a fan-rated box with a metal bar hanger. These boxes are reinforced for chandeliers or heavy pendants. Installation is the same but needs stronger fastening to joists.
- Without Attic Access: You need a remodel or "old work" ceiling box. Cut a hole the size the box requires (usually with a hole saw). For light fixtures, a standard remodel box works—wings expand behind the drywall when you tighten screws. For heavier fixtures, use a remodel box with a fan brace. This telescoping bar fits through the hole, extends to hit joists on both sides, then locks in place. The box attaches to the bar center. Turn off power at the breaker first. Test with a voltage tester before touching wires.
Retrofitting Solutions for Old Ceilings
Old houses create extra problems. Here's how to handle them:
- Plaster Ceilings: Plaster cracks easily. Use a hole saw at slow speed to avoid cracking. If plaster is loose or damaged, cut a larger hole and patch with drywall after installing the box. Remodel boxes work in solid plaster.
- Shallow Ceiling Cavities: Some old ceilings have little space between the ceiling and floor above. Standard boxes won't fit. Use low-profile or pancake boxes rated for your fixture weight. These sit almost flush with the framing but still meet code.
- No Joist Where You Want Light: If your ideal location falls between joists, an adjustable bar hanger fixes this. The bar spans joist to joist with the box mounted anywhere along it. Check the bar is rated for your fixture weight.
- Damaged Existing Boxes: If the box is cracked, rusted, or loose, replace it. You can often remove the old one and install a remodel box in the same hole. If the old box is nailed to a joist, cut it out with a reciprocating saw (power off first).
- Can't Install a Box?: If box installation is impossible—you're renting or the ceiling won't support it—battery operated ceiling lights work best. These mount with adhesive or small screws directly to the ceiling with no electrical connections. No box needed since there's no wiring. Make sure any box is rated for your fixture's weight. The packaging lists the weight limit. Never exceed this or mount fixtures without proper boxes—both create serious safety risks.
Problem 3 – Flickering Lights and Power Issues
Flickering lights are one of the most common complaints in old houses. Sometimes it's a quick fix like a loose bulb. Other times it signals dangerous wiring problems that need immediate attention. Knowing the difference can save you money and keep your home safe.
Common Causes of Flickering in Old Houses
- Loose Bulbs: LED bulbs flicker when not screwed in tightly.
- Incompatible Dimmer Switches: Old dimmers designed for incandescent bulbs make LED bulbs in lighting fixtures flicker or buzz.
- Loose Wire Connections: Wire connections loosen over time at fixtures, switches, or breakers, causing flickering and fire risk.
- Overloaded Circuits: Multiple appliances on the same circuit cause lights to dim when they turn on.
- Voltage Fluctuations: Old corroded wiring has higher resistance and causes voltage drops.
- Failing Fixtures: Worn sockets and corroded contacts in old lighting fixtures cause flickering.
- Aluminum Wiring Issues: Aluminum wiring oxidizes over time, creating heat, flickering, and fire hazards.
- Bad Neutral Connections: A loose neutral wire causes erratic voltage and flickering across the entire circuit.
Quick Diagnostic Steps You Can Do Yourself
Start with the easiest checks first:
Step 1 - Tighten the Bulb: Turn off the light, let the bulb cool, then screw it in firmly. Turn it back on. If flickering stops, you're done.
Step 2 - Try a Different Bulb: Replace the bulb with a new one of the same type. Bad bulbs flicker even when everything else is fine. If the new bulb works, the old bulb was the problem.
Step 3 - Check if It's Just One Fixture: Turn on other lights in the house. If only one fixture flickers, the problem is likely in that fixture or its immediate wiring. If multiple lights flicker, it's a circuit or panel issue.
Step 4 - Test the Switch: Flip the switch on and off several times. If flickering changes or stops temporarily, the switch might have loose connections or be worn out. Replacing a switch is straightforward if you're comfortable with basic electrical work.
Step 5 - Check for Patterns: Notice when flickering happens. Does it occur when you use certain appliances? That suggests an overloaded circuit. Does it happen randomly? That points to loose connections. Does it happen in bad weather? Water might be getting into outdoor electrical components.
Step 6 - Look at Dimmer Compatibility: If you have a dimmer switch, check if it's rated for LED bulbs. Most dimmers have this marked on them. Old dimmers say "incandescent only" or have no LED marking. Buy an LED-compatible dimmer (about $15-30) and swap it out.
Step 7 - Inspect Visible Connections: With power off at the breaker, remove the fixture cover and look at wire connections. Are wire nuts tight? Are wires properly inserted into push-in connectors? Loose wires are obvious fire hazards. Tighten any loose connections, but only if you know what you're doing.
Step 8 - Check the Breaker: Go to your electrical panel. Does the breaker feel warm? Is it loose? Try turning it fully off then back on. Sometimes breakers develop poor internal connections. If the breaker feels hot or looks burnt, don't touch it—call an electrician.
When Flickering Indicates Serious Electrical Problems
Some flickering means danger. Stop using the circuit and call an electrician immediately if you notice:
- Burning smell near fixtures, switches, or the breaker panel means overheating wires. Turn off the circuit immediately.
- Warm switches or outlets indicate loose connections or overloaded wiring. This starts fires inside walls.
- Brown or black marks around outlets or switches show arcing. The plastic is burning and needs immediate repair.
- Flickering throughout the house, especially with no appliances running, means a main panel or utility connection problem affecting your entire system.
- Lights brightening then dimming in waves indicates a loose neutral wire at the panel or meter. This damages appliances and causes fires.
- Flickering plus dead outlets on the same circuit means significant wiring problems—likely a loose neutral or damaged circuit.
- Visible arcing or repeated sparking at switches means bad contacts or wiring issues. A tiny spark is normal, but visible arcing isn't.
- Breakers tripping repeatedly mean overloaded circuits or a short somewhere. Don't just reset—find the cause.
- Aluminum wiring with any flickering needs inspection. Aluminum connections fail over time and create fire risks.
- Flickering after installing new fixtures means something went wrong during installation. Turn off power and recheck connections.
Old house wiring doesn't meet current safety standards. If you're seeing multiple warning signs, consider having the whole system evaluated. A full electrical inspection costs $200-500 but tells you exactly what needs fixing and what can wait. It's worth the peace of mind, especially in houses over 50 years old.
For situations where the electrical system is too problematic to fix easily or you're renting and can't modify wiring, battery operated ceiling lights eliminate these power issues completely. No wiring means no flickering from electrical problems.
Step-by-Step: How to Install a Ceiling Light in an Old House
Installing lighting fixtures in an old house requires extra care, but it's doable with the right approach.
Tools and Materials Checklist
Tools:
- Voltage tester (non-contact type)
- Screwdriver set (flathead and Phillips)
- Wire strippers
- Needle-nose pliers
- Ladder
- Flashlight or headlamp
- Drill with bits (if installing new hardware)
Materials:
- Your new light fixture
- Wire nuts (usually included)
- Electrical tape
- Junction box (if missing or damaged)
- Mounting hardware (usually included)
Safety Precautions
Turn off power at the circuit breaker, not just the switch. Find the right breaker by turning on the light, then flipping breakers until it goes off. Tape over the breaker so nobody turns it back on.
Use a voltage tester on all wires in the box—black, white, and bare copper if present. The tester shouldn't light up or beep. If it does, you've got the wrong breaker.
Work during daylight if possible. Make sure your ladder is stable. Have someone else home. If wiring looks damaged or melted, stop and call an electrician.
How to Install a Ceiling Light
Step 1: Remove the Old Fixture
With power off, unscrew the old fixture from the ceiling. The cover plate comes off to expose the junction box and wiring inside. You'll see wire nuts connecting fixture wires to house wires. Unscrew these counterclockwise and separate the wires while supporting the fixture so it doesn't drop.
The old mounting hardware in the junction box needs to come out too.
Step 2: Check the Box and Wiring
The junction box should be secure and free of cracks. It needs to attach firmly to a joist or support bar.
Look at the wiring condition next. Crumbling insulation means you need an electrician. The wires should extend at least 6 inches from the box. Most old houses have black and white wires, sometimes with a bare copper ground.
Step 3: Install Mounting Hardware
Most fixtures use a crossbar that screws into the junction box. The crossbar goes across the box opening and gets secured with the provided screws. It needs to be tight and level since it supports your entire fixture weight.
Your fixture's ground screw (if it has one) attaches to the crossbar at this point.
Step 4: Prepare Fixture Wires
Your fixture wires break down like this:
- Black or colored (hot)
- White (neutral)
- Green or bare copper (ground) Wire ends that are sealed need 1/2 inch of insulation stripped off. The exposed copper strands should be twisted clockwise so they're tight and neat.
Step 5: Connect the Wires
Wires match by color when you install a ceiling light:
The white wires connect together. Hold the stripped ends parallel, insert them into a wire nut, and twist clockwise until tight. A gentle tug tests the connection.
Black wires connect the same way.
The ground wire needs special attention: If your house has a ground wire, it connects to the fixture's ground with a wire nut. A metal box without a house ground means the fixture ground connects to the ground screw on the crossbar. No ground anywhere with a plastic box means you cap the fixture ground wire by itself.
Each wire nut gets wrapped with electrical tape for extra security.
Step 6: Attach the Fixture
The wires push up into the junction box. They need to fold gently without forcing. No bare wire should show outside the wire nuts.
The fixture canopy positions against the ceiling next. Mounting screws thread through the canopy into the crossbar. Hand-tighten them first to check alignment, then fully tighten with a screwdriver.
Some fixtures use a twist-lock system instead—the notches align, you push up, and twist to lock.
Step 7: Test
The bulbs go in now. Your fixture label shows maximum wattage—don't exceed it. LEDs work great because they produce less heat.
Head back to turn the breaker on, then flip the switch. The light should work immediately. If it doesn't, the breaker goes back off while you recheck connections.
Step 8: Finish Up
Any glass shades or covers attach at this point. The light needs testing several times over the next few hours to confirm everything works properly.
When to Call a Licensed Electrician
Some electrical work is beyond DIY skills or even illegal to do yourself.
- Red Flags Requiring Professional Help: Call an electrician immediately if you see burnt wires, smell burning odors, find knob-and-tube wiring, or have aluminum wiring that needs work. Flickering throughout the house, warm outlets or switches, or breakers that trip repeatedly all need professional diagnosis. If you open a junction box and don't understand what you're seeing, stop there.
- Illegal DIY Work: Most areas require licensed electricians for adding new circuits, upgrading electrical panels, or running new wiring through walls. Some jurisdictions require permits even for simple fixture replacements. Check your local codes before starting any work.
- Cost Expectations: Basic fixture installation costs $100-$200. Rewiring a room runs $1,500-$4,000. Full house rewiring can reach $8,000-$15,000. Electrical inspections cost $200-$500. Getting quotes from multiple electricians helps you find fair pricing.
Start Upgrading Your Old House Lighting Fixtures Today
You've got the knowledge to handle common problems with lighting fixtures in old houses. Some fixes you can do yourself when you learn how to install a ceiling light safely, while others need a pro. Can't deal with the wiring at all? Battery operated ceiling lights solve that problem without any electrical work. Whatever route you take, tackle it sooner rather than later—old wiring doesn't improve with age, and small problems turn into big ones fast.
Frequently Asked Questions About Installing Ceiling Lights in Old Houses
Q1: Can I install modern light fixtures in a 100-year-old house?
Yes, but you'll likely need modifications. Century-old homes usually have outdated wiring without grounding. You can install modern lighting fixtures if you upgrade the wiring, add a proper junction box, or use fixtures rated for ungrounded circuits. Metal fixtures need grounding, while plastic or glass fixtures work on old systems. Have an electrician inspect the wiring first.
Q2: Are battery operated ceiling lights bright enough?


Battery operated ceiling lights work well for closets, hallways, and accent lighting at 200-500 lumens. That's enough for basic visibility but less than hardwired fixtures (800-1600 lumens). For main room lighting, you'd need multiple units. They're best as supplemental lighting or where you can't install wiring.
Q3: How much does it cost to rewire lighting in an old house?
Rewiring one room costs $1,500-$4,000. Simply replacing fixtures without rewiring runs $100-$200 per fixture with an electrician. Full house rewiring ranges from $8,000-$15,000. Costs depend on your home's size, ceiling access, and local rates.
Q4: Do I need a permit to replace light fixtures?
No. Most areas don't require permits for simple fixture replacements on existing wiring. You do need permits for adding new circuits, installing junction boxes, or running new wiring. Check with your local building department first, as requirements vary by location.
Q5: What's the difference between a junction box and an electrical box?
There's no difference—they're the same thing. Both terms refer to the metal or plastic box that contains wire connections. When you install a ceiling light, you're working with a junction box mounted in the ceiling.
